
AWS Cognito User Pool is a user directory which provides sign-up and sign-in functionalities for your users. In this tutorial we will use User/Password Auth Flow managed by a Cognito App Client. A Cognito App Client is an application client which provides clients to call unauthenticated endpoints like sign-up, sign-in, forgot password etc. Without it users only can be added manually from AWS Console in other words by admins.
Here are the steps we will follow;
- Create Cognito User Pool
- Create Cognito App Client with USER_PASSWORD_AUTH Flow
- Sign-up a user from command line with
aws.cognito-idp - Login with registered user and verify that we get a successful response which includes JWT tokens.
CDK Code of Cognito UserPool with App Client
There are two constructs we will use which are UserPool and UserPoolClient
1
2
3
4
5
6
7
8
9
10
11
12
13
14
15
16
17
18
19
20
21
22
23
24
25
26
27
28
29
30
31
32
33
34
35
36
37
38
39
40
41
42
43
44
45
46
47
48
49
50
51
52
53
54
55
56
57
58
59
60
61
62
63
64
65
66
67
68
import * as cdk from 'aws-cdk-lib';
import * as cognito from 'aws-cdk-lib/aws-cognito';
import { Construct } from 'constructs';
export class CognitoUserPoolStack extends cdk.Stack {
constructor(scope: Construct, id: string, props?: cdk.StackProps) {
super(scope, id, props);
const userpool = new cognito.UserPool(this, 'awesome-user-pool', {
userPoolName: 'awesome-user-pool',
signInAliases: {
email: true,
},
selfSignUpEnabled: true,
autoVerify: {
email: true,
},
userVerification: {
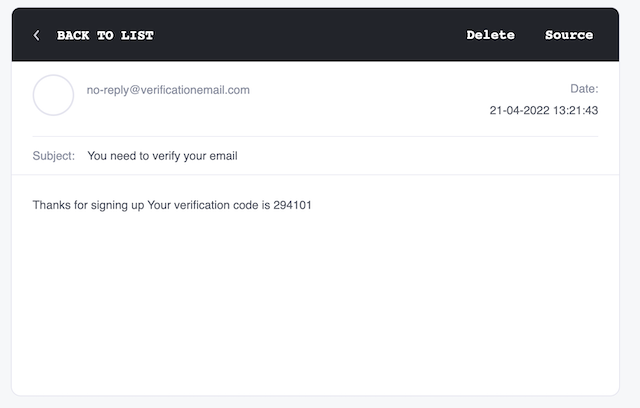
emailSubject: 'You need to verify your email',
emailBody: 'Thanks for signing up Your verification code is {####}', // # This placeholder is a must if code is selected as preferred verification method
emailStyle: cognito.VerificationEmailStyle.CODE,
},
standardAttributes: {
familyName: {
mutable: false,
required: true,
},
address: {
mutable: true,
required: false,
},
},
customAttributes: {
'tenantId': new cognito.StringAttribute({
mutable: false,
minLen: 10,
maxLen: 15,
}),
'createdAt': new cognito.DateTimeAttribute(),
'employeeId': new cognito.NumberAttribute({
mutable: false,
min: 1,
max: 100,
}),
'isAdmin': new cognito.BooleanAttribute({
mutable: false,
}),
},
passwordPolicy: {
minLength: 8,
requireLowercase: true,
requireUppercase: true,
requireDigits: true,
requireSymbols: false,
},
accountRecovery: cognito.AccountRecovery.EMAIL_ONLY,
removalPolicy: cdk.RemovalPolicy.DESTROY,
});
const appClient = userpool.addClient('awesome-app-client', {
userPoolClientName: 'awesome-app-client',
authFlows: {
userPassword: true,
},
});
}
}
Now lets go over with the properties of UserPool construct we created above;
userPoolName: Property for defining the name of Cognito UserPool resource. Though this is not a good practice explained heresignInAliases: A list of identifiers that a user can sign-in with. For example; email, phone, username etc.selfSignUpEnabled: Allows users to sign-up. If this is set to False then users only can be registered via AWS Console or bysign-upautoVerify: Makes Cognito to automatically verify given attributes by sending a verification code. Only email or phone can be configured for auto verify. Additionally, if these are defined in sign_in_aliases section then Cognito will auto verify them by default. However, if one them is set to False, then we have to use admin apis for verifying user’s attributes byadmin-update-user-attributesuserVerification: Configuration template for the verification messages sent to a newly registered user. Supports email and phone message templates which basically contains a code. IfselfSignUpEnabledis set to False, then users can only be verified by app admins byadmin-confirm-sign-upstandardAttributes: List of pre-defined attributes associated with a user.customAttributes: Map of custom attributes associated with a user. Cognito currently supports 50 custom attribute definitions which cannot be either deleted or updated. This is the part I don’t really like about Cognito. You can access more information herepasswordPolicy: A set of rules for defining the password policy.accountRecovery: Defines the method for recovering an account. It can only be either email or phone.removalPolicy: Property for specifying if UserPool should be deleted or retained. The default behaviour for UserPool isRETAINwhich means even we destroy the stack UserPool will remain in orphan state.
Additionally, here are the few properties we used for creating an AppClient;
userPoolName: Name of the AppClient. Again, naming aws resources is not a good practiceauthFlows: Types of the auth flows AppClient will support. In this example we are just using simple username password flow.
Deploying The CDK Stack
1
> cdk deploy CognitoUserPoolStack
After a successful deployment you will get an output like;
1
2
3
4
5
6
7
8
9
10
11
12
13
14
15
Synthesis time: 1.89s

CognitoUserPoolStack: deploying...
[0%] start: Publishing 7c7606651f89dfb939de56c0ad9c7993230f8f456f5a0280bd31e5819afd8f2a:us-east-1
[100%] success: Published 7c7606651f89dfb939de56c0ad9c7993230f8f456f5a0280bd31e5819afd8f2a:us-east-1
CognitoUserPoolStack: creating CloudFormation changeset...

CognitoUserPoolStack

Deployment time: 28.64s

Stack ARN:
arn:aws:cloudformation:us-east-1:stack/CognitoUserPoolStack/3b368ac0-c0d5-11ec-96d8-127bd92f1131

Total time: 30.53s
Creating a User From AWS CLI
There are a bunch of steps for registering and confirming a new user in cognito. We will use cognito-idp commands. Also, I will use dummy email account getting one from https://temp-mail.org/en
Sign-up User
The first step is sign-up a user by sign-up command.
1
2
3
4
5
6
> aws cognito-idp sign-up \
--client-id <app_client_id> \
--username sawijis139@wifame.com \
--password 1234Abcd^ \
--user-attributes Name="email",Value="sawijis139@wifame.com" Name="family_name",Value="Foobar" Name="custom:tenantId",Value="1234567890" Name="custom:createdAt",Value="2022-01-01" Name="custom:employeeId",Value="10" Name="custom:isAdmin",Value="false" \
--region us-east-1
Response;
1
2
3
4
5
6
7
8
9
{
  "UserConfirmed": false,
  "CodeDeliveryDetails": {
    "Destination": "w***@c***",
    "DeliveryMedium": "EMAIL",
    "AttributeName": "email"
  },
  "UserSub": "38f58e04-96a4-4ab0-94c4-2d9ce5bd0ab1"
}
Confirm User
Next step is confirming the user by admin-confirm-sign-up command. Since this is an admin command we don’t have to provide the verification code. This will move user’s confirmation state from Unconfirmed to Confirmed state.
1
2
3
4
> aws cognito-idp admin-confirm-sign-up \
--user-pool-id <user_pool_id> \
--username wiyovah293@carsik.com \
--region us-east-1
Update User Attribute
Final step is updating user’s email attribute as verified by calling the command admin-update-user-attributes
1
2
3
4
5
> aws cognito-idp admin-update-user-attributes \
--user-pool-id <user_pool_id> \
--username wiyovah293@carsik.com \
--user-attributes Name=email_verified,Value=true \
--region us-east-1
Creating a User From Web App
We will create a user from a web app which uses AWS Amplify. The related project can be from my github repository. It only has two input fields for taking user email and password. The standard and custom attributes are given as hard coded parameters for signup. Also, the two methods we are calling can be found at Amplify documentation.
Here is the simple Amplify signup function.
1
2
3
4
5
6
7
8
9
10
11
12
const { user } = await Auth.signUp({
  username: email,
  password,
  attributes: {
    email: email,
    family_name: 'foobar',
    'custom:tenantId': '1234567890',
    'custom:createdAt': '2022-01-01',
    'custom:employeeId': '10',
    'custom:isAdmin': false,
  },
});
After a successful response we will receive a verification email based on the template we defined.
And the second part is confirming signup of the user.
1
const result = await Auth.confirmSignUp(this.state.email, verifyCode);
Finally, our cognito user pool will have a verified user
1
> aws cognito-idp list-users --user-pool-id <app_client_id> --region us-east-1
1
2
3
4
5
6
7
8
9
10
11
12
13
14
15
16
17
18
19
20
21
22
23
24
25
26
27
28
29
30
31
32
33
34
35
36
37
38
39
40
41
{
    "Users": [
        {
            "Username": "45aea613-73c3-4265-bd5d-854d5bd715e9",
            "Attributes": [
                {
                    "Name": "custom:employeeId",
                    "Value": "10"
                },
                {
                    "Name": "custom:tenantId",
                    "Value": "1234567890"
                },
                {
                    "Name": "sub",
                    "Value": "45aea613-73c3-4265-bd5d-854d5bd715e9"
                },
                {
                    "Name": "email_verified",
                    "Value": "true"
                },
                {
                    "Name": "custom:createdAt",
                    "Value": "2022-01-01"
                },
                {
                    "Name": "family_name",
                    "Value": "foobar"
                },
                {
                    "Name": "email",
                    "Value": "sawijis139@wifame.com"
                }
            ],
            "UserCreateDate": "2023-02-26T20:16:30.191000+03:00",
            "UserLastModifiedDate": "2023-02-26T20:16:53.406000+03:00",
            "Enabled": true,
            "UserStatus": "CONFIRMED"
        }
    ]
}
User Signin
I will use another AWS CLI command for signing in and verify that we are getting related JWT tokens.
1
2
3
4
> aws cognito-idp initiate-auth --auth-flow USER_PASSWORD_AUTH \
--client-id <app_client_id> \
--auth-parameters USERNAME=wiyovah293@carsik.com,PASSWORD=1234Abcd^ \
--region us-east-1
1
2
3
4
5
6
7
8
9
10
{
	"ChallengeParameters": {},
	"AuthenticationResult": {
		"AccessToken": "eyJraWQiOi...",
		"ExpiresIn": 3600,
		"TokenType": "Bearer",
		"RefreshToken": "eyJjdHkiOiJKV...",
		"IdToken": "eyJraWQiO..."
	}
}
On the other hand, we can use signIn method from Amplify like;
1
const user = await Auth.signIn(email, password);
Destroy the Stack
Don’t forget to delete the stack after your testing.
1
> cdk destroy CognitoUserPoolStack
Hopefully, this was a helpful guide for creating AWS Cognito UserPool by AWS CDK. Here you can also find the related github repository
Comments powered by Disqus.